GuidesCreating & Managing Listings
🏠
Creating & Managing Listings
Master the 6-step listing wizard and manage your entire portfolio
8 min read8 steps
.webp)
Master the 6-step listing wizard and manage your entire portfolio
In this guide
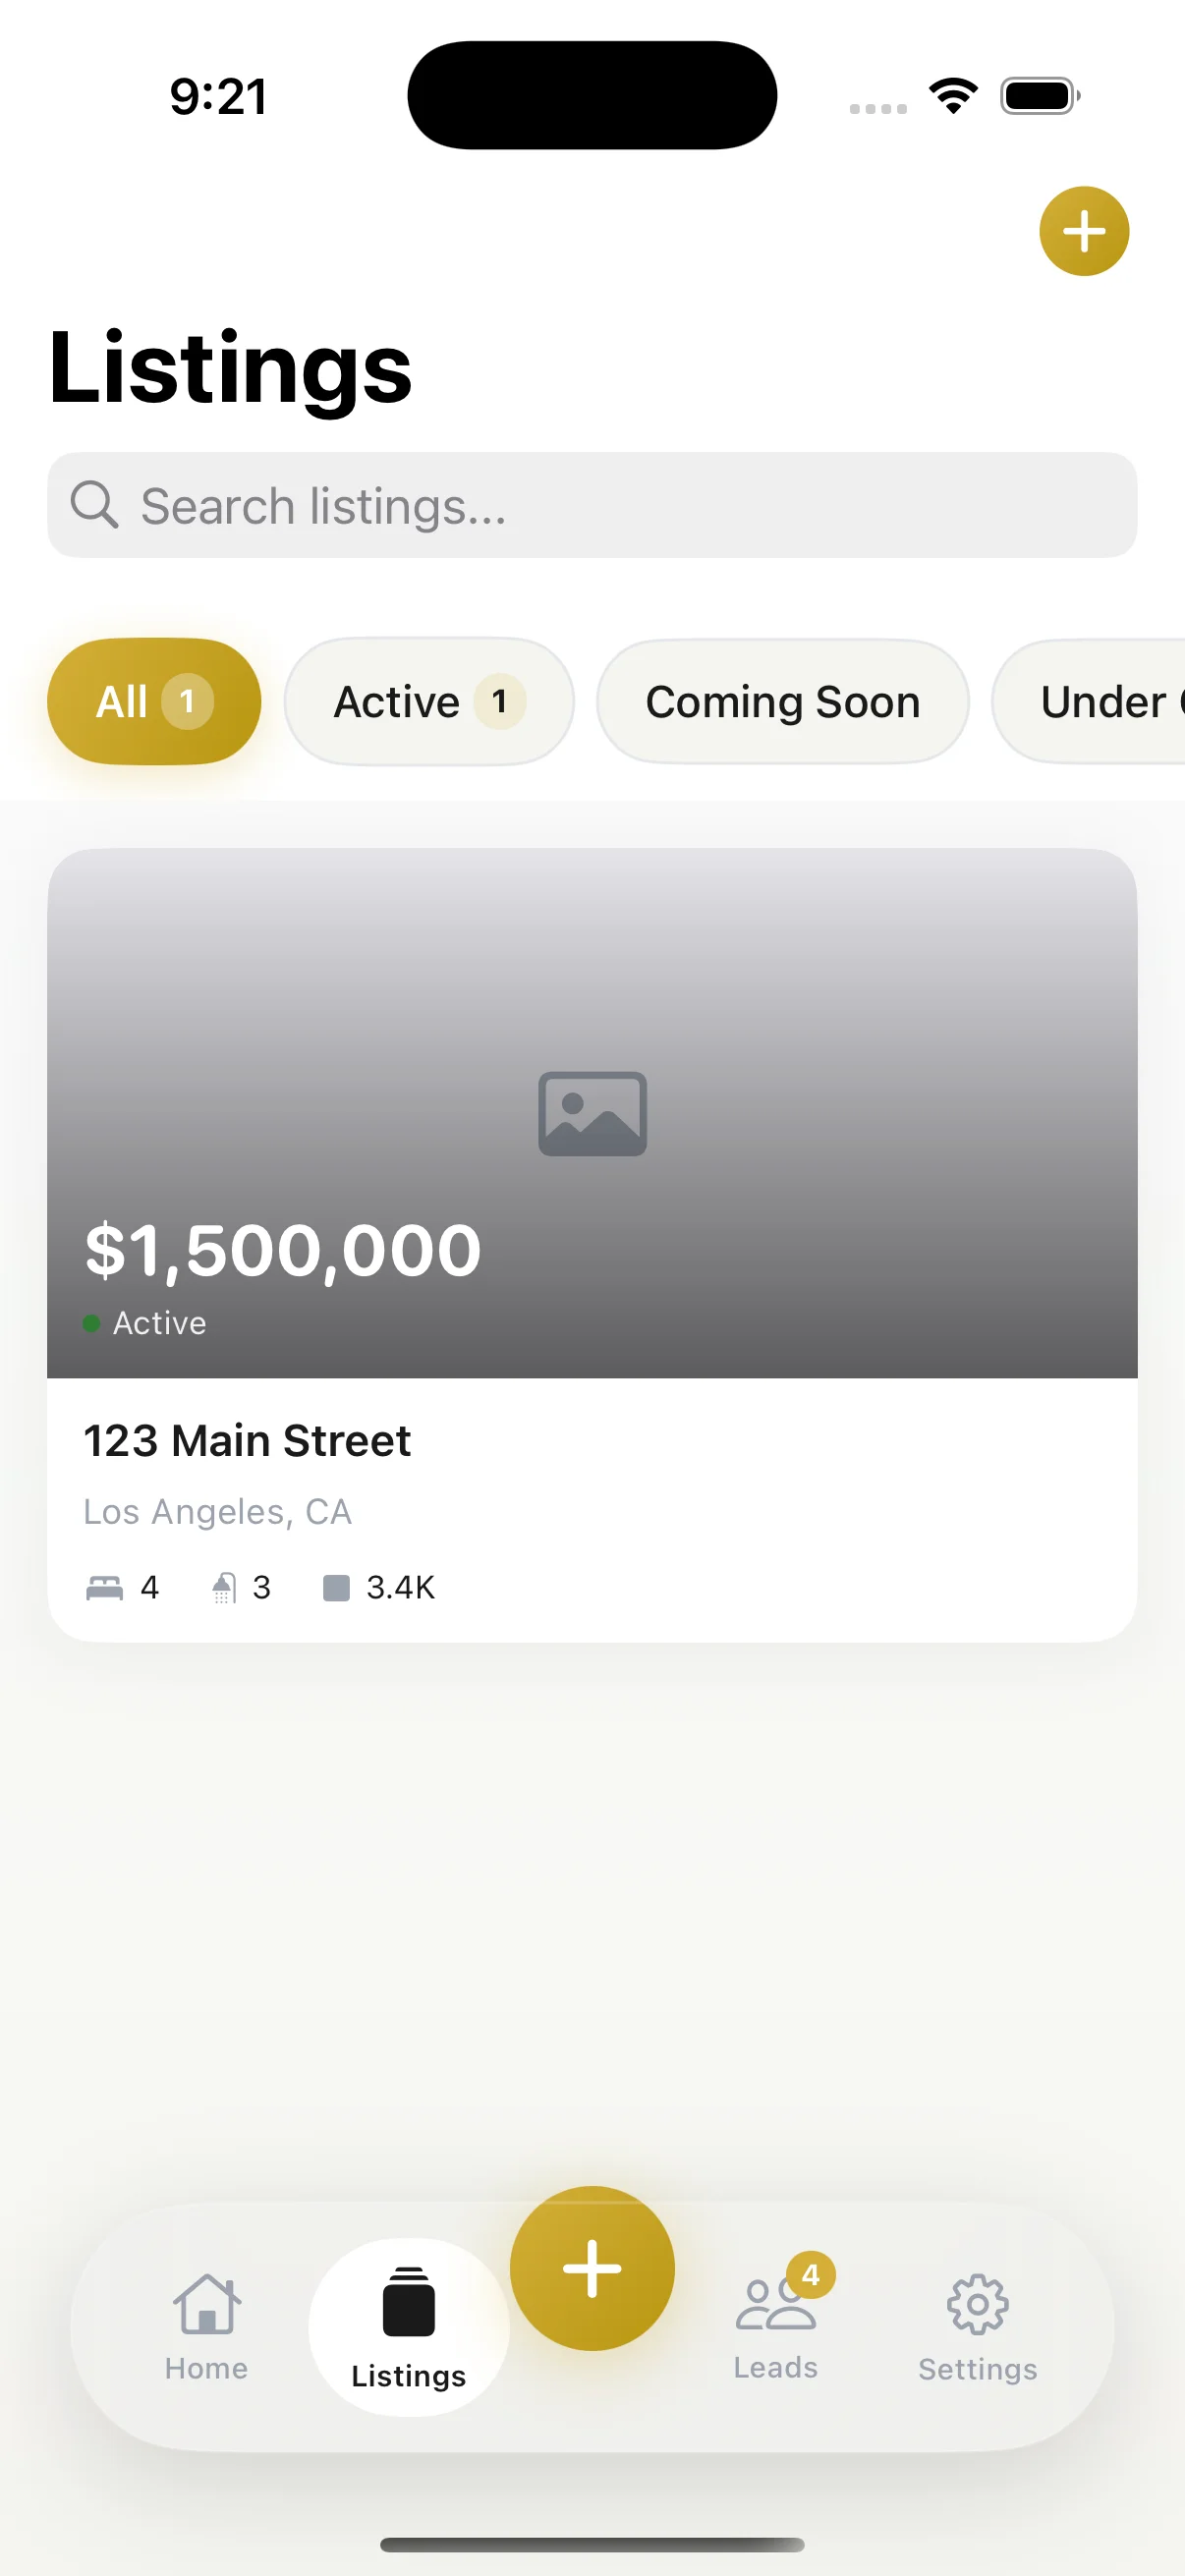
Tap the golden "+" button in the center of the tab bar, or hit "Create Listing" from the Listings tab. You'll see the Listings screen with search, filter pills (All, Active, Coming Soon, Under Contract), and a prominent call-to-action to create your first listing.
The wizard starts with "Where is the property located?" Enter the street address, optional unit/apt number, city, state, and ZIP code. Required fields are marked with a red asterisk. You can save as a draft at any time and come back later. Tap Continue to move to the next step.
.webp)
Select the property type (Single Family, Condo, Townhouse, Multi-Family, and more), then enter bedrooms, bathrooms (with +/- stepper), square footage, year built, listing price, and HOA fee if applicable. These details populate your MLS descriptions, listing cards, and analytics.
.webp)
Step 3 lets you add up to 30 property photos. Tap the "+ Add Photos" tile to select from your library or capture new ones with Guided Photography. Drag to reorder and tap the star icon to set your hero image. You can save as a draft and come back anytime.
Pro tip:The first photo (hero image) is what buyers see first. Choose your most compelling exterior or living room shot.
.webp)
Select features that apply to your property from a curated tag grid: Pool, Smart Home, Updated Kitchen, Hardwood Floors, Wine Cellar, Home Theater, Solar Panels, EV Charging, Gated Community, Mountain Views, Ocean Views, Fireplace, Walk-in Closets, Chef's Kitchen, Outdoor Kitchen, Hot Tub, and more. You can also add custom features with the text field at the bottom.
.webp)
This is where the magic happens. Choose from six tones — Luxury (elegant, sophisticated), Family (warm, welcoming), Investor (ROI-focused, factual), Modern (contemporary, trendy), Minimal (clean, concise), or Bold (attention-grabbing, confident) — then tap "Generate Content" to create your MLS description, social posts, and email copy tailored to your property.
.webp)
After generating content, scroll down to review the Generated Content cards: MLS Description, Public Description, SMS Blurb, and more — each with a green checkmark and a copy button. The step progress bar at the top shows all five steps completed (Address, Property Details, Photos, Features, AI Content). Tap "Save Changes" to save your listing.
.webp)
On the Listings tab, use filter pills to quickly switch between All, Active, Sold, and Drafts. The search bar finds listings by address, price, or any detail. Each listing card shows the hero photo, price, address, beds/baths, and view count.
Pro tip:Drafts save automatically. Come back anytime to finish a listing you started.
Download ListingOS and follow along with this guide.